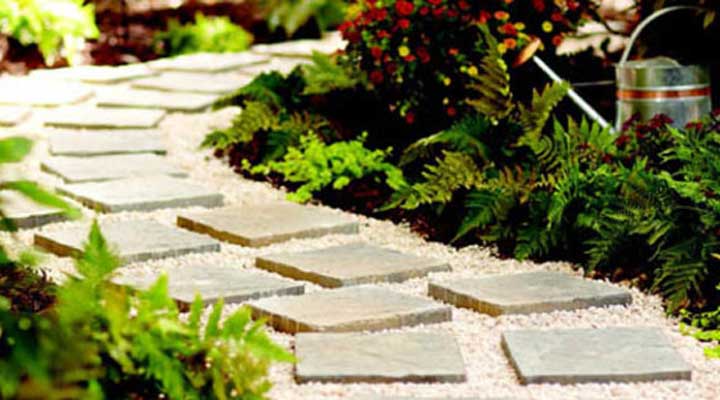
How to Make a Garden Path to Sweeten Your Outdoor Space
Mar 31, 2023 / Matthew Sanderson
Some people turn to Public Storage when they are going through a remodel, but so many of us consider our outdoor spaces as important as what’s behind four walls, especially when weather warms in the spring and summer. Around this time, how to make a garden path is a DIY project worth learning, whether to improve curb appeal or make the area out back its best.
We turned to experts for their advice on keeping it quick and easy, just like renting a storage unit, so you can get back to sipping sweet tea and enjoying your upgrade. A simple DIY stone or pebble path set on soil, with no grout, is a great project for beginners and it can be completed in a single afternoon.
“A stone pathway is a great addition to any landscape,”; said Missy Henriksen, vice president of public affairs for the National Association of Landscape Professionals.

First Decide if Your Garden Path Ideas are Doable
Not only must stones be laid safely to easily walk on, but you should also consider how water would drain in order to avoid puddling or flooding. Running a path down a steep hill or at a seasonal stream would make this a more challenging project, and you should compare the project at hand to the time you have.
“A pathway project can turn from beginner-level to intermediate especially if it requires building steps and laying stone on extremely uneven elevation,”; said Jasmine Gurley, of The Home Depot.In addition, a homeowner should ensure there are no underground pipes, lines or cables that would interfere with any digging involved. Gurley suggests calling 811, a national phone line for questions about digging at your property, or visiting call811.com. The resource was set up by the Common Ground Alliance and the U.S. Department of Transportation’s Pipeline and Hazardous Materials Safety Administration.
Do the legwork now on your garden path ideas so you’re set for life.
“Once a path is established and built, it is not easy to move it,”; Henrikson said.
Choose Your Garden Path Materials
The type of stone you use depends on personal preference and functionality. In order to make a pathway as safe as possible and reduce any instances of tripping, homeowners should pick a flat stone or paver that is easy to walk one. Sandstone, limestone, granite and slate are all popular materials. So are concrete pavers in all shades.
“For a loose stone pathway, gravel is easiest to handle and the least expensive material,”; Henrikson said.

Create your garden path
Once you’ve determined the project area, the paver or step stone size and type, and the quantities required, it’s time to get to work on your garden path! gurley breaks it down into size easy steps from start to finish.
If you create a path that is 20 feet long and three feet wide using 12-inch by 12-inch paver stones, you know that the total area needed for the path is 60 square feet. this is a common pathway size for many homeowners looking to create a simple stone path.
For a simple pathway, homeowners only need a few tools and materials: circular saw, safety glasses, spade (or shovel or tiller), shovel wheelbarrow, push broom, tamper, gloves and a mason’s hammer. as for materials, have your gravel or choice of stone, paver base and sand and any edging material, such as metal, stone or brick. it’s also helpful to have stakes, string and pea pebbles on hand.
Use a circular saw to cut your stones to fit the path layout. if you have a large number of pavers to cut, opt for a circular saw fitted with a diamond-tipped masonry blade. you can also opt to buy precut pavers.
A landscape, brick or stone supplier should offer the largest selection of all types of pavers, henrikson said.
Gurley suggests laying the pavers out in pairs with six inches of space between each pair, while leaving a gap of both three inches and six inches between the pavers and the walkway edge. the paver pairs will alternate spacing as the path continues. with this pattern, you would need a total of 28 pavers.
After planning, prepare the area by plotting out the path and clearing away any grass to a depth of around four to six inches. use stakes and string to mark out the course and finished elevation of the path. next, use the spade to clear the area.
Fill the base of the path with paver base, which is an aggregate layer of crushed rock that is typically limestone, at a depth of about four inches. then, use the tamper to level out and settle the base. consider a powered tamper for larger paths.
Next, apply a layer of leveling sand at a depth of about one inch, and tamp the leveling sand into place. the next step is laying the stones.
“Sketch the pattern for your stones, if possible, to make the process more organized and simpler,”; gurley said. “using a measuring tape while laying out your stones, double-checking the distance as you go along.”;
Sweep the path and remove any remaining sand by spreading it across the stones. use the push broom to sweep it in between the stones.
Fill the space to finish the project, which could be mulch, and that can help the path blend in with the surrounding vegetation. pea pebbles are another common choice.
“They can be used to create an eye-catching color contrast with the color of your stepping stones,”; gurley said.


